Tortoise Incubator Guide: Perfectly Incubate Your Tortoise Eggs in 4 Steps
by Luke Tansley on in Guides
Tortoises have been a very popular pet in the UK since the 60s, and some people are still caring for their childhood pet today.
For many people, tortoises are their first interaction with a reptile and their invitation to the wider hobby. At Northampton Reptile Centre, Hermann's and Greek spur-thighed tortoises are still very popular to this day.
If you plan to go further with the hobby and breed your very own tortoises, we have created this handy guide on how to best incubate your tortoise eggs.
1. Prepare Your Egg Box

Unlike other reptile eggs, tortoise eggs require very high humidity but no direct contact with moisture. For this reason, the way we set up the tub is slightly different.
For this method, you will need a small airtight container that will fit into your tortoise incubator. You will also need a second smaller tub (no lid) that can fit inside the large tub, leaving a half-inch gap around the sides and to the lid. We start by filling the smaller tub 3/4 full with chemical-free sand. Into this, we press small indents spaced apart so that the eggs can be rested without risk of turning.
The small tub can be placed in the centre of the large tub, leaving a gap around the edge, this gap is going to retain all the water, which will evaporate over time, keeping humidity extremely high. If you plan to stack multiple tubs inside the enclosure, it’s best at this point to label them so you know their proper place in the incubator.
2. Collecting the Eggs

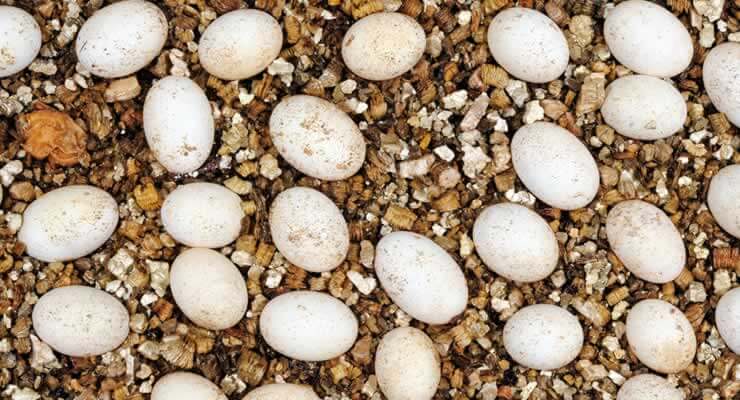
Collecting tortoise eggs is actually a lot easier than many other species. The eggs are usually large, very plump and much more resilient than other reptiles. Technically, as long as they have not warmed up and started incubating, you should be able to turn them, but just in case, we advise keeping them perfectly upright the entire time.
Key Handling Guidelines
The eggs are fairly hardy, and if found soon after laying, are usually plump and easy to pick up. Simply pick the egg up between your thumb and forefinger with light pressure, hold your open palm beneath just in case and transfer it to your egg box.
- Gentle Pressure: When picking up an egg, use a light touch between your thumb and forefinger.
- Support: Always hold your open palm beneath the egg as a precaution during transfer.
- Orientation: Keep the egg upright at all times to avoid damaging the developing embryo inside.
Securing the Eggs in the Egg Box
Each egg should have a small indent ready for it. Simply place the egg, making sure it doesn’t turn, and press the medium around it to secure it in place.
You don’t need to bury the eggs, having them around 1/4 below the surface is more than enough to make sure they don’t roll when you move the box. Make sure you leave plenty of space between eggs so they don’t touch. Cover the tub with its lid and place the entire thing into the incubator.
Please Note: Any time you take the tub out, you’ll need to be careful to make sure it goes back in the same way. Eggs in warmer parts of the incubator will usually hatch first, and there may be a few days between the warmest spot and coolest spot.
3. Setting Up the Incubator

Your incubator should have both heating and cooling functions and be accurate to within 1 degree Celsius. Having both heating and cooling means the incubator can correct temperatures inside much quicker and deal with warm rooms much better than a unit with only heating.
The most popular incubator we currently sell is the Lucky Reptile Herp Nursery II, but Exo Terra also provides a good alternative. The incubation temperature should be set to 84 degrees Fahrenheit and tested to make sure it works perfectly before you need it.
The products are high quality and very reliable, but mistakes in transit can happen, and you want to make sure yours is definitely ready for when you need it. As a secondary check, you could keep another thermometer inside the incubator just to double-check temperatures.
4. The Incubation

It’s advised that you check your tortoise eggs as much as possible, we usually look quickly every day but have a good scan every week or so. You won’t need to take the lids off very often, and it’s best to avoid interfering as much as possible, as you may lose some heat or ambient humidity.
We usually just check on them through the door on the front of the unit. With this setup, it’s really easy to see how much humidity is left, as you will see the water level in the surrounding gap drop over time. If it drops too low, simply top it up with lukewarm water. We try to keep it between 1/2 and 1/4 full all the time.
The main things to keep an eye out for are how plump the eggs seem and if any of them have perished or are going bad. The eggs are usually plump, and while the humidity is available, when this starts to drop, you may see them sink a little and start to shrivel. The incubating eggs will need to breathe but don’t need very much air flow, once a fortnight or so, we crack one corner to let the air recycle.
The last thing to look for is discolouration on the egg. If an egg has perished or starts to go bad, it will usually turn quite dark and shrivel up. We would usually keep these but isolate them from the rest of the clutch; it’s always surprising how resilient they are, and these eggs still have a chance to come to term.
What happens next?

Your tortoise eggs will take roughly 8-10 weeks to hatch, so it’s a long wait for baby tortoises. When the tortoise hatches, it will cut through the egg, then sit inside until the fluid has absorbed.
Once this is done, it will slowly come out and rest on the sand. When the tortoise is fully out of the egg, you can remove it and place it in the enclosure. If the tortoise is taking a long time to come out, just be patient. If you are worried, please give us a call so we can advise.
Remember that these may all hatch at different rates, so don’t worry if they aren’t all out and ready straight away. Keep the unhatched eggs incubated and stay patient!
Final Thoughts
We are around all year, so if you have any questions regarding a successful incubation process or care for the animals afterwards, please contact us by email at sales@reptilecentre.com, call our Northampton store on 01604 753823 ext. 2 or our Towcester store on 01327 350088. Good luck!


